On: Queens Blade/Lost World
Posting that Melona battle book a few days ago, I got reminded on 'Queens Blade Battle', a program made to pretty much allow people to play Queens Blade/Lost World in a digital format. As awesome and rad as that is, I noticed when reading the site were it's posted, there's been repeated questions on "How the heck do I even play this? What am I trying to do? Is there a better way to play and think about my options beyond [Pick attack at random]?".
Welp, in an effort to get more people to give it a go ( more less I guess count as a small distraction from my end while things get figured out here ), I've felt like trying to make a guide on the in's and out of Queens Blade/Lost World battling system, and in turn, the nuances that come along with it. For this guide though, I'll be taking into account people not knowing the in's and outs, yet will be using QBB to play, and not physical books. If doing the latter, there are already guides on how to read and use the matrix for live play.
Because it was Melona that got me to give this a go again, we'll use her for the examples here. So first and first most we have our Character sheet. Much like the D&D equivalent, it gives us all of the nitty gritty of who we're about to use, special rulings for attacks, and other details as necessary.
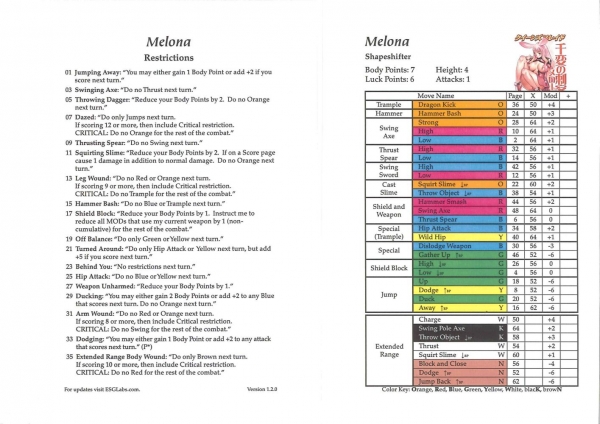
As you can see, we've got a few stats at the top to take notice of. 'Battle Points' or 'BP' is this game's version of Health, as if it hit's 0, you lose, and like D&D, if it goes -5 or more, you 'die' ( any EXP and stat upgrades are void and null, you can read up that more on QBB's FAQ ). Next up is Height, that tends to not come into play much, but when it does determines any negative or bonus damage we inflict when attacking. Larger height = more damage, smaller = less damage. The 'Luck Points' for Melona can end up as many different terms ( Luck, Tactics, Red/Green/Purple Magic, ect ect. ) for other books, but these factor into the RL book game using cards to give yourself bonuses or gear outside of your default, and are not implemented into QBB ( for many reason, but the main one being that getting a hand on these cards is almost null nowadays, and the newest books lack these stats anyway). Attack is how many attacks someone can preform per 'turn', and 99% of the time will be locked at '1'. On this note, you might notice the attacks we have are color coded in turn, and this is big to note. There are 3 colors towards attacking ( Orange [heavy], Red [High], and Blue [Low] ), hit different area's ( High's are your 'anti-air' options and tend to aim for the head, low's are to catch 'ducking' opponents and tend to aim for the legs, and Orange are powerful blows that tend to toss you around recklessly, leaving you easy to be counter-attacked ) and they in turn have different attack ranges depending on what's being done...And this is were a lot of people get confused at, attacking.
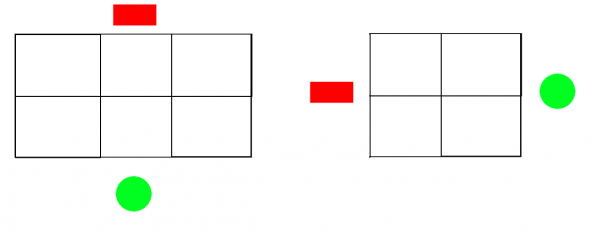
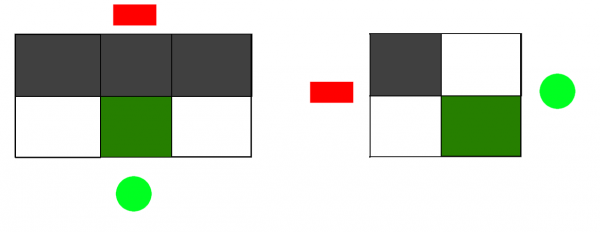
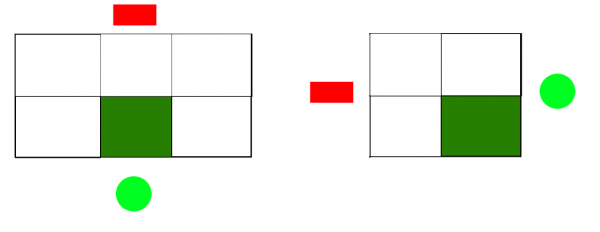
To make it easy to understand, try to picture this as a 3D fighter, with attacks filling a grid like space. I'll use a visual diagram to show off what's going on, and how it's working. The Green Dot would be Melona in this case, with the red Square being our current foe, whoever that might be. On the left, we're getting a top-down view of the action, with what we can see is 2 rows of 3, and the right from the side with 2 rows of 2.
Now let's say from our attack options with Melona, we wanted to use her 'Thrust Spear: High':
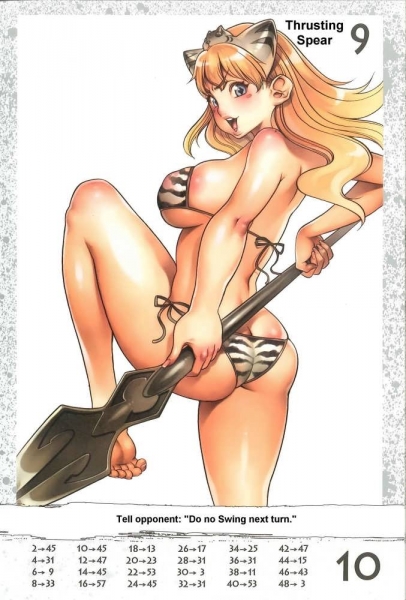
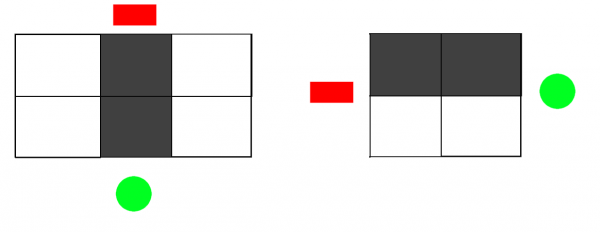
This is what would result as a visual diagram. The Thrust is a direct forward attack that aim's to hit high, pretty self explanatory right? It's really good at just stabbing someone if they try to charge you, or catching someone jumping giving it hits High regardless of distance.
While say her 'Swing Axe:Low':
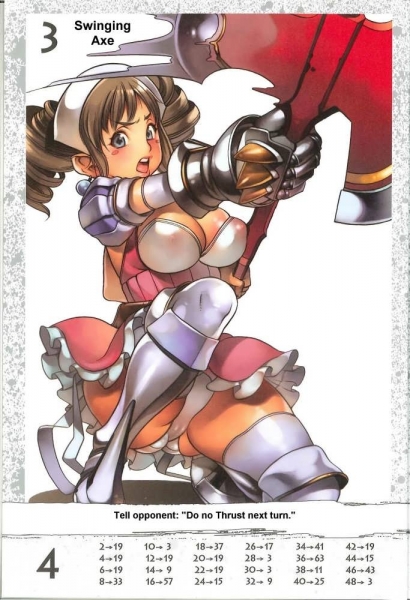
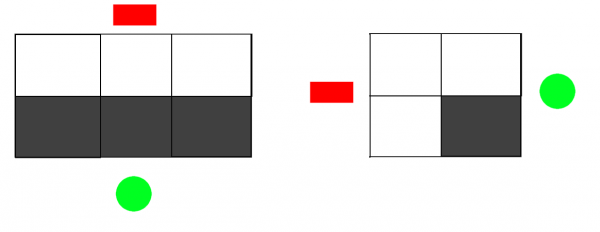
This in turn is made more catching people trying to dodge towards the sides, and to catch people ducking as well. As you can see, we're able to 'cover' areas of the battle with these attacks, and if our opponent ends up in one of these 'squares', we can count them as a 'Score'.
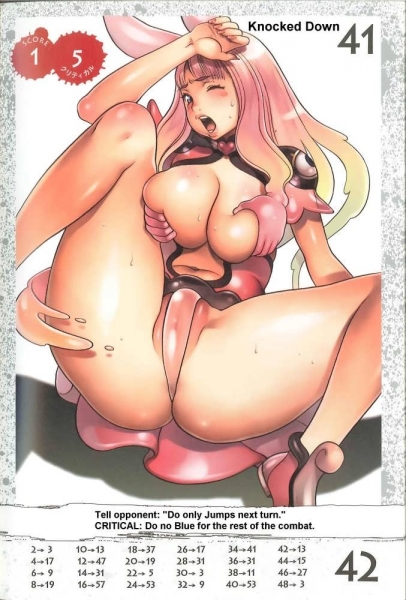
Score pages is how damage is done in this game, with the 'SCORE' on the page being the base damage, and with our MOD's from our attacks, determine the final damage dealt towards the opponent. So, that's all the 'easy' stuff, so how about we touch on more 'complex' stuff?
Case in point, you might notice for Melona's 'Swing Sword' attacks, that the 'High' is Blue, and the 'Low' is Red. "But, wait, you said just before that Blue is low and Red is high!", and that's true! These are special 'fake out' attacks, and as such work far differently. Now, when we do an attack, this will place us into the attack's own respective zone, kinda like we have both a 'hitbox' and a 'hurtbox' as most fighting games go. So for the Thrusting Spear, we can be hit at the center top square by an opponent's attack in turn, but only if it's long reaching. In turn the swing, we can be hit as well from the lower center, but because it only reaches out one row, the opponent only needs to do the same.
Fake outs are different:
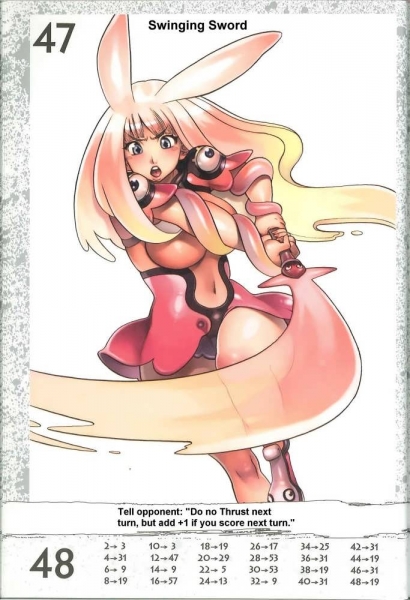
As shown here, this is what 'Sword Swing: High' looks like. We 'start' low, and in turn put our 'hurtbox' into the lower square, but then we strike high, and because it's a swing, we swipe in a wide arc in front of us. This let's us dodge attacks coming in high, while still hitting someone using a high attack in turn. There are weaknesses towards these kind of attacks, and others though, and that's ending up at a disadvantaged pose.
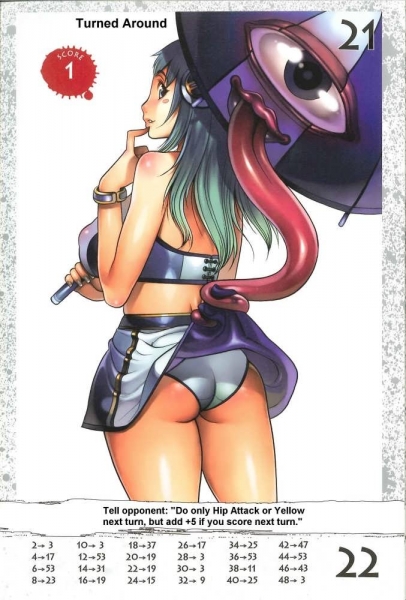
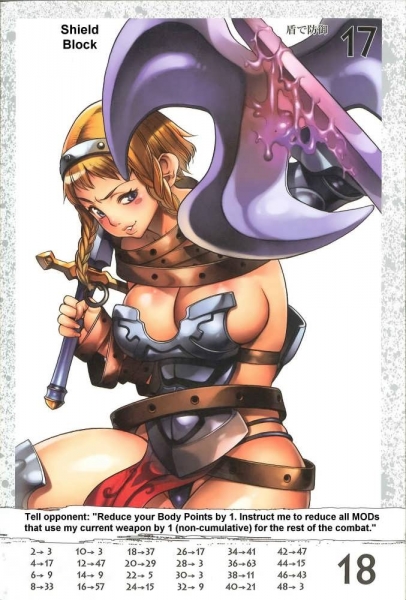
Swings can end up really bad on a miss, as they can in turn spin you in such to have your back at the foe. Thrust can as well if evaded directly. Depending on your opponent, your attack can also be parried, or blocked outright, and this tends to give them an advantage over you, even if you might land on a SCORE page ( although, a low score at that ). Case in point, while Melona will take 1BP of damage blocking a blow, she will for the rest of the battle lower her opponent's MOD's by 1, period, reducing their overall damage onto her.
So, now with all of the attacking in mind, what are our options about AVOIDING damage? Those in turn are the Green and Yellow attacks we have at our disposal. Under 'Jump', we have 4 universal options everyone will have: Up, Dodge, Duck, and Away. Just like attacking, this will place our 'hurtbox' into different zones in an attempt to avoid taking damage, and if successful, tends to give some sort of bonus towards you. As you could guess, Jump sends us up high, so any high attack will hit us, Duck being the same with low. Dodge will be sniped by Swings, and Away by Thrusts.
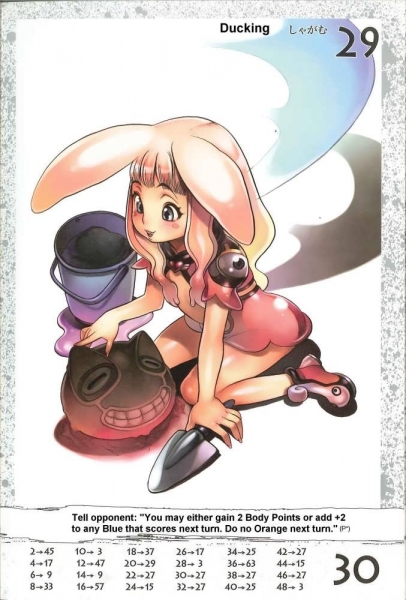
Admittedly, learning a character is learning about what options gives them their best bonuses, and what you're able to do after each attack. Some attacks, while very powerful, will leave you suddenly forced into evasion if you want to or not, and others will disable other colors, or types of attacks, limiting your options, and making your available attacks a lot more predictable towards your opponent. These are all factors you need to keep in mind, along with an idea of 'where' an attack is trying to hit at, and what options your opponent has in turn, that begins to build the overall mind game.
...As you can tell, this is already very complex, even with me breaking it down like that. Thankfully QBB handles all of the really complex stuff automatically. It'll disable the correct attacks depending on your options, it'll change your MOD's as well, take care of everyone's health, and even do the Matrix searching and results as well. Yet knowing what attacks to use, and how to use them is still up towards the player, and that's were the largest amount of fun comes from. If nothing else though I hope this guide's helped make it a lot more clear on what's 'going on' when you choose an attack, and what to keep in mind when playing someone in turn!
Welp, in an effort to get more people to give it a go ( more less I guess count as a small distraction from my end while things get figured out here ), I've felt like trying to make a guide on the in's and out of Queens Blade/Lost World battling system, and in turn, the nuances that come along with it. For this guide though, I'll be taking into account people not knowing the in's and outs, yet will be using QBB to play, and not physical books. If doing the latter, there are already guides on how to read and use the matrix for live play.
Because it was Melona that got me to give this a go again, we'll use her for the examples here. So first and first most we have our Character sheet. Much like the D&D equivalent, it gives us all of the nitty gritty of who we're about to use, special rulings for attacks, and other details as necessary.

As you can see, we've got a few stats at the top to take notice of. 'Battle Points' or 'BP' is this game's version of Health, as if it hit's 0, you lose, and like D&D, if it goes -5 or more, you 'die' ( any EXP and stat upgrades are void and null, you can read up that more on QBB's FAQ ). Next up is Height, that tends to not come into play much, but when it does determines any negative or bonus damage we inflict when attacking. Larger height = more damage, smaller = less damage. The 'Luck Points' for Melona can end up as many different terms ( Luck, Tactics, Red/Green/Purple Magic, ect ect. ) for other books, but these factor into the RL book game using cards to give yourself bonuses or gear outside of your default, and are not implemented into QBB ( for many reason, but the main one being that getting a hand on these cards is almost null nowadays, and the newest books lack these stats anyway). Attack is how many attacks someone can preform per 'turn', and 99% of the time will be locked at '1'. On this note, you might notice the attacks we have are color coded in turn, and this is big to note. There are 3 colors towards attacking ( Orange [heavy], Red [High], and Blue [Low] ), hit different area's ( High's are your 'anti-air' options and tend to aim for the head, low's are to catch 'ducking' opponents and tend to aim for the legs, and Orange are powerful blows that tend to toss you around recklessly, leaving you easy to be counter-attacked ) and they in turn have different attack ranges depending on what's being done...And this is were a lot of people get confused at, attacking.
To make it easy to understand, try to picture this as a 3D fighter, with attacks filling a grid like space. I'll use a visual diagram to show off what's going on, and how it's working. The Green Dot would be Melona in this case, with the red Square being our current foe, whoever that might be. On the left, we're getting a top-down view of the action, with what we can see is 2 rows of 3, and the right from the side with 2 rows of 2.

Now let's say from our attack options with Melona, we wanted to use her 'Thrust Spear: High':


This is what would result as a visual diagram. The Thrust is a direct forward attack that aim's to hit high, pretty self explanatory right? It's really good at just stabbing someone if they try to charge you, or catching someone jumping giving it hits High regardless of distance.
While say her 'Swing Axe:Low':


This in turn is made more catching people trying to dodge towards the sides, and to catch people ducking as well. As you can see, we're able to 'cover' areas of the battle with these attacks, and if our opponent ends up in one of these 'squares', we can count them as a 'Score'.

Score pages is how damage is done in this game, with the 'SCORE' on the page being the base damage, and with our MOD's from our attacks, determine the final damage dealt towards the opponent. So, that's all the 'easy' stuff, so how about we touch on more 'complex' stuff?
Case in point, you might notice for Melona's 'Swing Sword' attacks, that the 'High' is Blue, and the 'Low' is Red. "But, wait, you said just before that Blue is low and Red is high!", and that's true! These are special 'fake out' attacks, and as such work far differently. Now, when we do an attack, this will place us into the attack's own respective zone, kinda like we have both a 'hitbox' and a 'hurtbox' as most fighting games go. So for the Thrusting Spear, we can be hit at the center top square by an opponent's attack in turn, but only if it's long reaching. In turn the swing, we can be hit as well from the lower center, but because it only reaches out one row, the opponent only needs to do the same.
Fake outs are different:


As shown here, this is what 'Sword Swing: High' looks like. We 'start' low, and in turn put our 'hurtbox' into the lower square, but then we strike high, and because it's a swing, we swipe in a wide arc in front of us. This let's us dodge attacks coming in high, while still hitting someone using a high attack in turn. There are weaknesses towards these kind of attacks, and others though, and that's ending up at a disadvantaged pose.

Swings can end up really bad on a miss, as they can in turn spin you in such to have your back at the foe. Thrust can as well if evaded directly. Depending on your opponent, your attack can also be parried, or blocked outright, and this tends to give them an advantage over you, even if you might land on a SCORE page ( although, a low score at that ). Case in point, while Melona will take 1BP of damage blocking a blow, she will for the rest of the battle lower her opponent's MOD's by 1, period, reducing their overall damage onto her.

So, now with all of the attacking in mind, what are our options about AVOIDING damage? Those in turn are the Green and Yellow attacks we have at our disposal. Under 'Jump', we have 4 universal options everyone will have: Up, Dodge, Duck, and Away. Just like attacking, this will place our 'hurtbox' into different zones in an attempt to avoid taking damage, and if successful, tends to give some sort of bonus towards you. As you could guess, Jump sends us up high, so any high attack will hit us, Duck being the same with low. Dodge will be sniped by Swings, and Away by Thrusts.


Admittedly, learning a character is learning about what options gives them their best bonuses, and what you're able to do after each attack. Some attacks, while very powerful, will leave you suddenly forced into evasion if you want to or not, and others will disable other colors, or types of attacks, limiting your options, and making your available attacks a lot more predictable towards your opponent. These are all factors you need to keep in mind, along with an idea of 'where' an attack is trying to hit at, and what options your opponent has in turn, that begins to build the overall mind game.

...As you can tell, this is already very complex, even with me breaking it down like that. Thankfully QBB handles all of the really complex stuff automatically. It'll disable the correct attacks depending on your options, it'll change your MOD's as well, take care of everyone's health, and even do the Matrix searching and results as well. Yet knowing what attacks to use, and how to use them is still up towards the player, and that's were the largest amount of fun comes from. If nothing else though I hope this guide's helped make it a lot more clear on what's 'going on' when you choose an attack, and what to keep in mind when playing someone in turn!
